Cream White Elegant Bow Bag Free Crochet Pattern
Create a stylish cream white bow bag with this free crochet pattern. It's perfect for adding a charming touch to any outfit.
Published October 5, 2026 · by Amanda
- Skill level
- Intermediate
- Yarn weight
- Worsted (4)
- Hook size
- 5 mm (H-8)
- Time
- 5 hours
- Gauge
- 14 dc x 8 rows = 10 cm
- Yardage
- about 400 yards
- Sizes
- 30 × 20 cm (12 × 8 in)
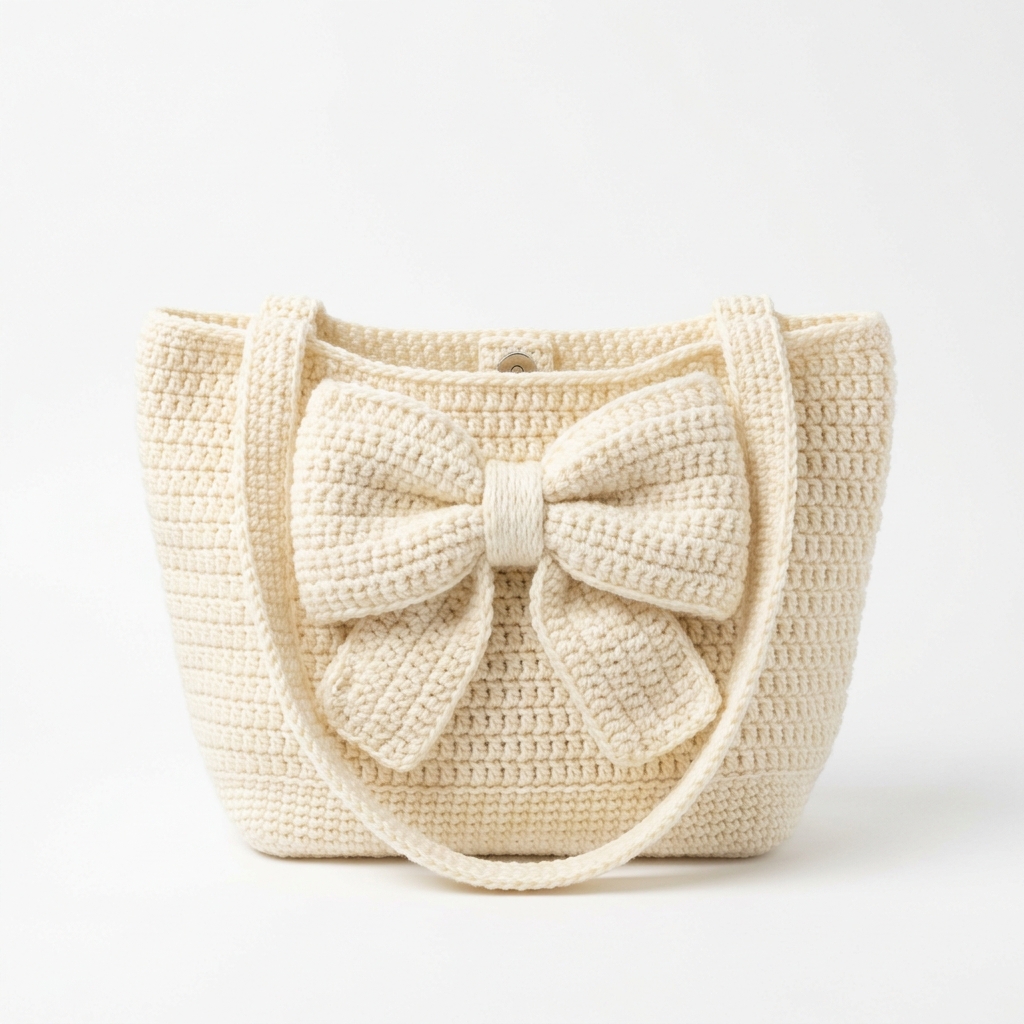
This elegant bow bag is a charming accessory designed for any occasion, showcasing a tasteful cream white color and a decorative bow. It is perfect for carrying essentials with style. You will enjoy crocheting this bag as it combines straightforward techniques with a touch of creativity, making it both fun and rewarding. You will use basic stitches like double crochet and single crochet, while also learning a special stitch for the bow.
Why You'll Love This Bow Bag
- Stylish design – the decorative bow adds a lovely touch to your accessory.
- Practical size – holds your essentials while looking chic.
- Intermediate skills – boosts your crochet skills with enjoyable techniques.
- Fast project – complete it in about 5 hours!
Is This Pattern Good for Beginners?
While this pattern is categorized as intermediate, beginners with a little experience will find it manageable. You'll learn new skills along the way, such as making a bow and constructing the bag's base. Don't worry, we’ll guide you through each step together!
Crochet Abbreviations (US Terms)
- ch – chain
- dc – double crochet
- sl st – slip stitch
- st(s) – stitch(es)
- hdc – half double crochet
- sc – single crochet
Special Stitch: Bow
- Ch 11.
- In 2nd ch from hook, hdc, hdc in next 8 ch, 3 hdc in last ch.
- Working on the other side, hdc in next 8 ch, hdc in the last ch.
- Sl st to join; cinch the middle together with a piece of yarn and tie securely. Gently fluff the ends.
Size and Gauge
- Finished Size: Approximately 30 × 20 cm (12 × 8 in)
- Gauge: 14 dc x 8 rows = 10 cm (4 in). To check gauge, complete a swatch of 16 dc for 10 rows. If your swatch does not match the gauge, adjust your hook size accordingly.
How to Crochet the Bow Bag (Step by Step)
Body of the Bag
The body of the bag is worked flat and then joined.
- Ch 41.
- Row 1: Dc in the 4th ch from hook and in each ch across (39 dc).
- Row 2: Ch 3, turn. Dc in each dc across (39 dc).
- Rows 3–13: Repeat Row 2 (13 rows total). You should have 13 rows of dc with a height of approximately 20 cm (8 in).
- At the end of Row 13, do not fasten off. Continue to foundation round.
Join and Create the Base
We're going to create the base to give your bag its shape.
6. Round 1: Ch 1, 1 sc in each dc around (39 sc).
7. Round 2: Ch 1, sc in the next 12 sc, (sc, ch 3, sc) in the next sc (to form a corner), sc in the next 12 sc, (sc, ch 3, sc) in the next sc, repeat in the final section (39 sc).
8. Round 3: Ch 1, sc in each sc around (39 sc).
9. Rounds 4–5: Repeat Round 3 twice more (39 sc).
10. Round 6: Ch 1, sc in each sc around (39 sc); join with a sl st to first sc. Fasten off.
Straps
The straps are simple and will complete the look of your bag.
11. Ch 81.
12. Row 1: Sc in the 2nd ch from hook and in each ch across (80 sc).
13. Row 2: Ch 1, turn. Sc in each sc across (80 sc).
14. Rows 3–5: Repeat Row 2 two more times (80 sc).
15. Fasten off and create another strap in the same manner.
Assembly & Finishing
Now let’s put everything together to finish your bag!
- Fold the body of the bag and align the bottom edges. Use whip stitch or slip stitch to join the bottom seams to secure the shape.
- Attach the straps securely to the sides of the bag. Use a tapestry needle to sew the strap ends with multiple back and forth stitches to ensure strength.
- Sew the magnetic snap closure to the inside of the bag.
- Create the bow: follow the special stitch instructions provided. Sew it to the front of the bag to embellish.
- Weave in all ends and block the bag if necessary for shaping.
Beginner Tips for a Neat Bow Bag
- Use stitch markers to keep track of your rows.
- Count your stitches regularly to prevent mistakes.
- Maintain consistent tension for a uniform look.
Common Mistakes (and How to Fix Them)
- “My project is uneven.” – This often happens due to varying tension. Try to keep your tension consistent, or use a tension square as practice.
- “The bag isn’t holding its shape.” – It might need additional interfacing or stabilizer. Consider adding craft interfacing to the base for better structure.
- “The bow looks flat.” – Ensure you added enough stuffing to the bow for fullness; gently fluff as needed.
How to Care for Your Bow Bag
Hand wash in cold water and lay flat to dry to avoid distorting its shape. Avoid wringing out the bag, as this can damage the stitches.
FAQ
How can I adjust the size of the bag?
To make a smaller bag, reduce the starting chain and the number of rows. For a larger bag, add more chains in multiples of 2 and increase the row count.
How do I wash my bag?
Hand wash in cold water and lay flat to dry. Avoid wringing it out to maintain its shape.
Can I use a different yarn weight?
Yes! Just be aware that if you use a different yarn weight, you'll need to adjust your hook size and potentially the finished gauge.
Want to create a complete set? Check out our range of patterns or try the matching bow scarf.
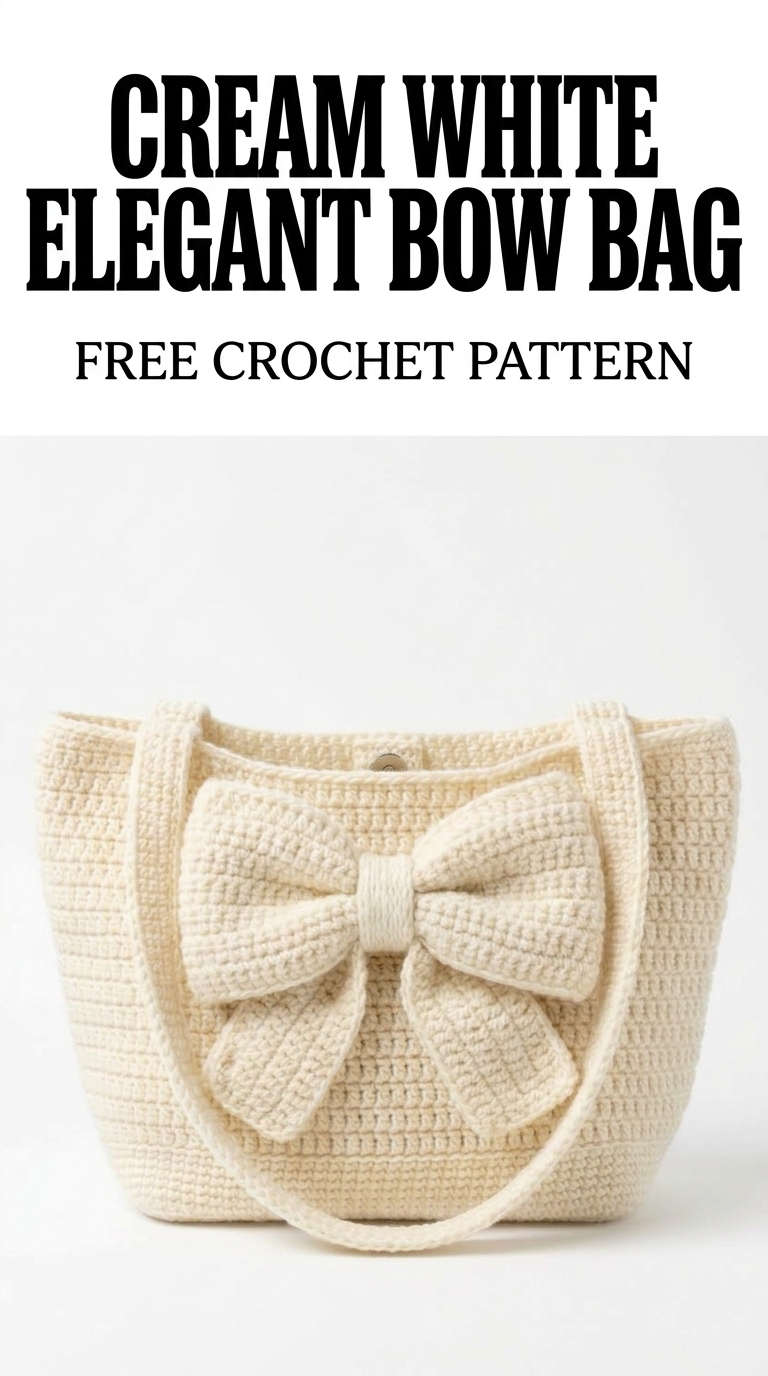
Image shown for inspiration — your finished result may vary slightly.