Earthy Boho Granny Square Bag Free Crochet Pattern
Create a stylish, functional bag from colorful granny squares with this easy-to-follow crochet pattern.
Published October 5, 2026 · by Amanda
- Skill level
- Intermediate
- Yarn weight
- Worsted (4)
- Hook size
- 5.0 mm (H-8)
- Time
- 6 hours
- Gauge
- 20 sts and 10 rows = 10 cm
- Yardage
- about 1000 yards
- Sizes
- 30 × 35 cm (12 × 14 in)
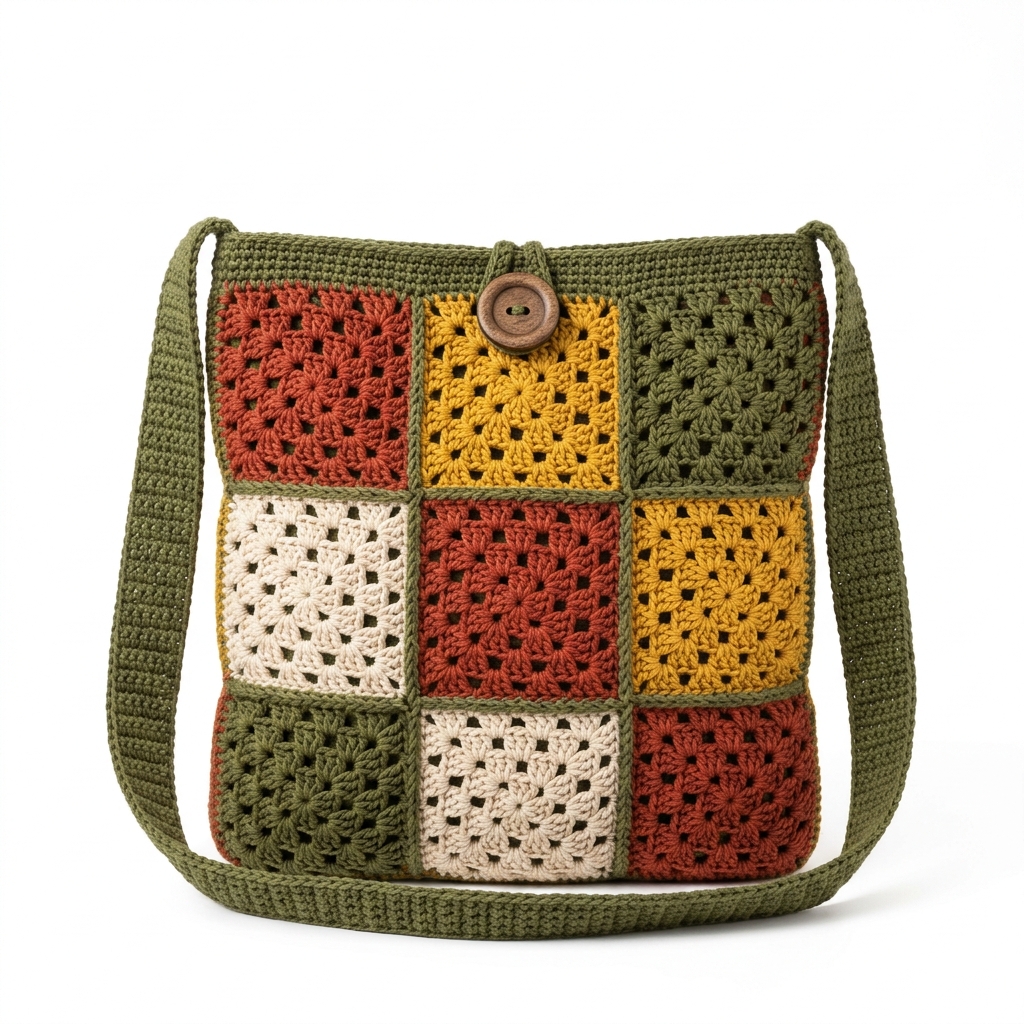
This Earthy Boho Granny Square Bag is a stylish and functional crochet bag made from colorful granny squares. It’s perfect for casual outings or light shopping, blending bohemian vibes with earthy tones. This project primarily uses the double crochet stitch and slip stitch, making it an enjoyable piece to create.
This pattern is suitable for those with some crochet experience, as you'll learn how to make granny squares and assemble them into a beautiful bag.
Why You'll Love This Bag
- Stylish design – the earthy colors make it a fashionable accessory.
- Functional size – roomy enough for everyday use.
- Customizable – change the colors or add a lining to suit your personal taste.
- Engaging project – enjoy the satisfaction of creating something unique with granny squares.
Is This Pattern Good for Beginners?
Yes! While the bag requires some intermediate skills, the granny squares are straightforward to make. Once you understand the squares, assembling the bag is simple and rewarding.
Crochet Abbreviations (US Terms)
- ch – chain
- dc – double crochet
- sl st – slip stitch
- sp – space
- st(s) – stitch(es)
Granny Square – (3 dc, ch 2) in the same stitch, repeat for the corners.
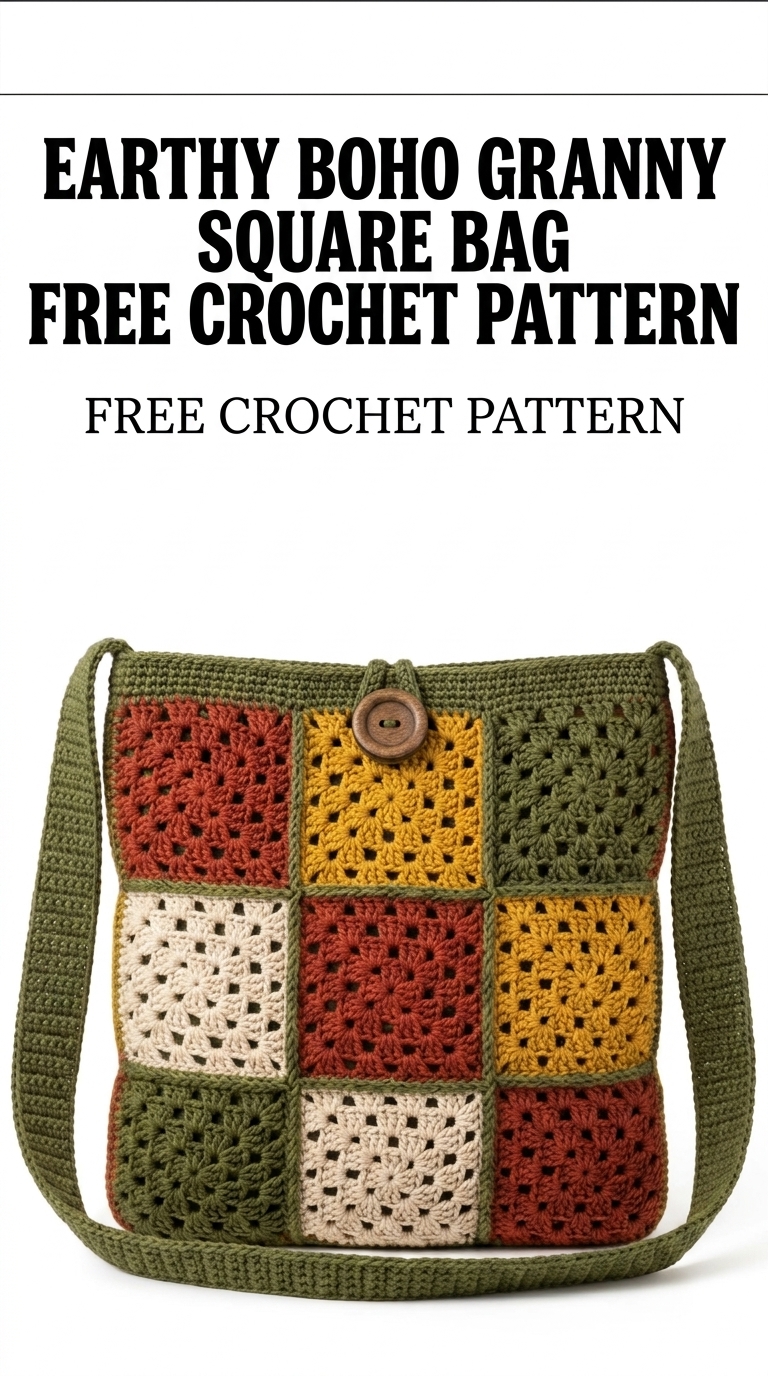
Image shown for inspiration — your finished result may vary slightly.
Size and Gauge
- Finished Size:
- Height: 35 cm (14 in)
- Width: 30 cm (12 in)
- Strap Length: Approximately 100 cm (40 in), adjustable.
- Gauge: 20 stitches and 10 rows = 10 cm (4 in) in granny square pattern.
How to Crochet the Granny Squares (Step by Step)
We'll start by making the granny squares. Each square is built in rounds.
Part 1: Granny Squares
- Start with Color A:
Ch 4, join with sl st to form a ring. - Round 1:
Ch 3 (counts as 1 dc), 2 dc in ring, ch 2, (3 dc, ch 2) 3 times in ring, join with sl st to the top of ch 3. (12 dc, 4 ch-2 sp) - Round 2:
Sl st to the first ch-2 sp, ch 3 (counts as 1 dc), 2 dc in the same sp, ch 2, (3 dc, ch 2) in each of the next 3 ch-2 sps, join. (24 dc, 4 ch-2 sp) - Round 3:
Sl st to the first ch-2 sp, ch 3, *3 dc, ch 2, 3 dc in next ch-2 sp; repeat from * around, join. (36 dc, 4 ch-2 sp) - Color Change: Fasten off Color A, attach Color B, and repeat Rounds 1 to 3 to create a total of 8 granny squares.
Part 2: Assembling the Bag
The squares will now be assembled into the bag.
- Lay out the 8 granny squares in a 3x3 configuration.
- Join squares together using sl st through the outer loops only.
- Join the last square section horizontally to create the bag body.
Part 3: Creating the Strap
Now we’ll make the strap.
- Ch 60 with Color C.
- Row 1: In the 2nd ch from hook, dc in each ch across. (59 dc)
- Row 2: Ch 2, turn, dc in each st across. Repeat for 10 more rows, totaling 12 rows.
Part 4: Final Assembly
We’ll attach the strap and finish the bag.
- Attach the strap securely to the bag using sl st (or sewing for added strength).
- (Optional) Sew a large button to the bag for closure.
Finishing the Bag
- Lining: Cut fabric to match the inner dimensions of the bag. Pin into place inside the bag and sew along the top edge.
- Weave in all ends from yarn.
- Block the finished piece gently to shape.
Beginner Tips for a Neat Bag
- Use stitch markers to mark your rounds for more organized work.
- Count your stitches frequently to avoid and catch mistakes early.
- Check your tension; make sure you’re working evenly to ensure a uniform look.
Common Mistakes (and How to Fix Them)
- "My squares are uneven." – This likely means different tensions; keep your stitches consistent.
- "The bag feels too loose." – Your stitches may be too loose, try working tighter or using a smaller hook.
- "My squares aren’t the same size." – Check that you’re following the gauge; ensure each square is made with the same number of stitches.
How to Care for Your Granny Square Bag
Hand wash or machine wash on a delicate cycle, and lay flat to dry. This will help maintain the shape and beauty of your bag.
FAQ
How many granny squares do I need for this bag?
You need a total of 8 granny squares for this bag.
Can I use a different yarn for this project?
Absolutely! As long as you match the gauge, you can choose any yarn you prefer.
How do I adjust the size of the bag?
You can increase the number of granny squares for a larger bag or make fewer for a smaller size.
Want to create a complete set? Check out our range of patterns or try the matching pouch.