Lavender Dream Granny Square Tote Free Crochet Pattern
A fun and easy crochet pattern to make a stylish tote bag from lavender-themed granny squares, perfect for everyday use.
Published October 5, 2026 · by Amanda
- Skill level
- Beginner
- Yarn weight
- Worsted (4)
- Hook size
- 5.5 mm (I/9)
- Time
- 3 hours
- Gauge
- 16 dc and 8 rows = 10 cm
- Yardage
- about 400 yards
- Sizes
- 35 × 30 cm (14 × 12 in)
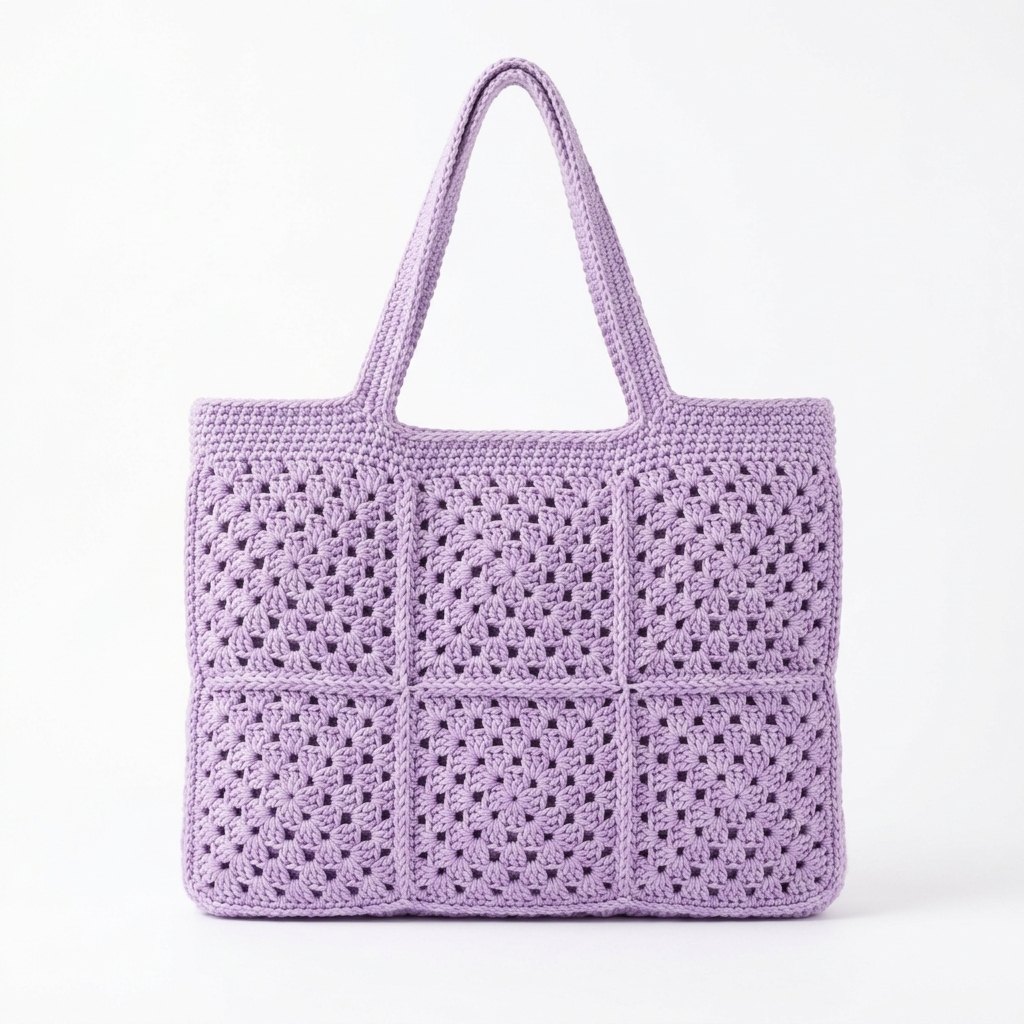
This Lavender Dream Granny Square Tote pattern is perfect for crafting a stylish bag made from beautiful, lavender-themed granny squares. It's fun and easy to make, using basic stitches like double crochet and slip stitch. You’ll enjoy not only the process but also the final product which is practical for carrying your everyday essentials.
This pattern is suitable for crocheters of all skill levels, especially those looking to create a classic tote with simple steps. You’ll learn to crochet granny squares and assemble them into a functional bag!
Why You'll Love This Tote
- Quick and manageable – make this project in just a few hours.
- Versatile style – perfect for everyday use or special occasions.
- Easy to customize – play with colors for a personalized touch.
- Eco-friendly option – a great alternative to plastic bags.
Is This Pattern Good for Beginners?
Yes! This pattern uses basic stitches and simple assembly techniques. The step-by-step instructions will guide you through the process, making it approachable even if you’re new to crochet.
Crochet Abbreviations (US Terms)
- ch – chain
- sl st – slip stitch
- dc – double crochet
- sp – space
Size and Gauge
- Finished Size: 14 × 12 in (35 × 30 cm)
- Gauge: 16 dc and 8 rows = 10 cm (4 in) in granny square pattern. Make a swatch and measure to confirm gauge adjustments if necessary.
Step-by-Step Instructions
Granny Squares (Make 6)
The granny squares are crocheted in rounds, starting from a magic ring.
- Using Color A, make a magic ring.
- Round 1: Ch 3 (this counts as your first dc), 2 dc into ring, ch 2, *3 dc into ring, ch 2; repeat from * two more times. Join with sl st to the top of beginning ch 3. (12 dc + 3 ch spaces, 4 corners)
- Round 2: Sl st into first ch 2 sp. Ch 3, 2 dc, ch 2, 3 dc in the same sp; 3 dc in the next ch 2 sp, ch 2, 3 dc in the same sp; repeat around. Join with sl st to the top of beginning ch 3. (24 dc + 4 ch spaces)
- Rounds 3–5: Repeat Round 2, increasing in each ch 2 corner sp until you have 5 rounds and 60 dc total. Fasten off and weave in ends.
Assembling the Tote
The squares are joined together to form the body of the tote.
- Layout Squares: Arrange 6 granny squares in two rows of 3 for the tote body.
- Joining Squares: Use a whip stitch or slip stitch to join the squares along the edges. Join row 1 (3 squares), then join row 2 squares to row 1 squares. You should now have a rectangular piece made of 6 squares (14 × 12 in).
Creating the Handles
The handles are crocheted separately and attached to the tote.
- Handle Straps (Make 2): Using Color A,
- Ch 60, dc into the 4th ch from the hook and into each ch across for a total of 58 dc. Fasten off.
- Attach Handles: Pin each handle to the top edge of the tote, positioned 3 in (7.5 cm) from the sides. Sew in place using a whip stitch.
Lining the Tote
(Optional) A lining can add a nice finish and extra durability. Pin the lining fabric inside the tote, folding the top edges of the fabric over the crochet edges. Whip stitch to secure.
Assembly & Finishing
Weave in all ends and gently block the entire tote. For added firmness, consider using fabric stiffener on the lining. You may also want to attach a decorative crochet flower or button for embellishment.
Beginner Tips for a Neat Tote
- Use stitch markers to keep track of your rounds.
- Count your stitches after every row to ensure you’re on track.
- Check your tension regularly to keep your squares consistent.
Common Mistakes (and How to Fix Them)
- "My squares are different sizes." – Ensure consistent tension while crocheting.
- "The bag feels floppy." – Consider adding lining or fabric stiffener for more structure.
- "I can’t fill my tote to the top." – Ensure you have joined the squares securely at the edges.
How to Care for Your Tote
Hand wash in cold water and lay it flat to dry. This helps maintain its shape and bright colors over time.
FAQ
How can I change the colors in the pattern?
You can easily substitute the lavender with any other color you prefer. Just choose the yardage accordingly.
Can I make this bag larger?
Yes, you can simply increase the number of granny squares you make for a larger tote. Just remember to use additional yarn.
How long does it take to make this bag?
The total estimated time is about 3 hours, with approximately 2 hours for making the granny squares and 1 hour for assembling them.
Want to create a complete set? Check out our range of patterns or try the matching pouch.
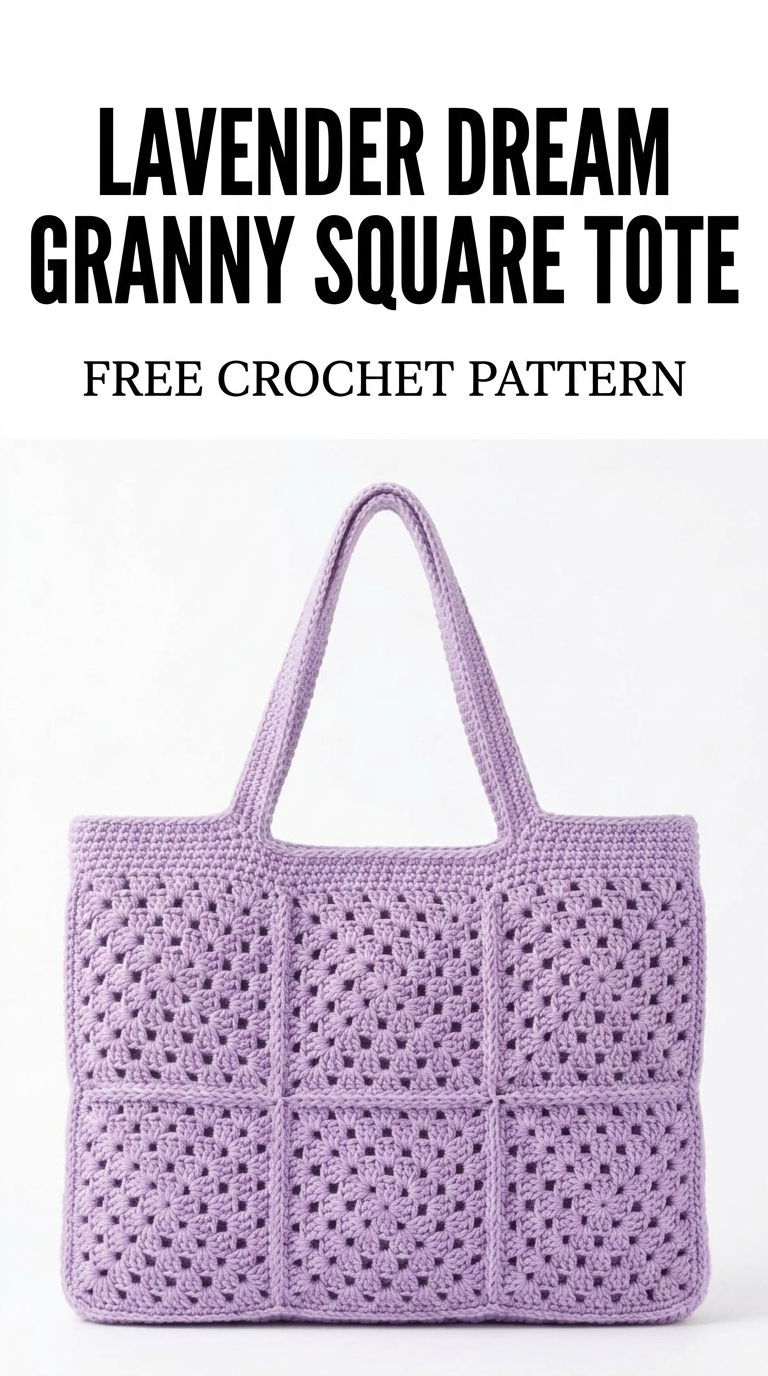
Image shown for inspiration — your finished result may vary slightly.