Navy Nautical Floral Bucket Bag Free Crochet Pattern
A stylish bucket bag pattern featuring a navy nautical theme and floral appliqués, perfect for carrying your essentials.
Published October 5, 2026 · by Amanda
- Skill level
- Intermediate
- Yarn weight
- Medium Worsted (4)
- Hook size
- 5 mm (H-8)
- Time
- 5–7 hours
- Gauge
- 11 dc and 6 rows = 10 cm
- Yardage
- about 800 m
- Sizes
- 30 × 25 cm (12 × 10 in)
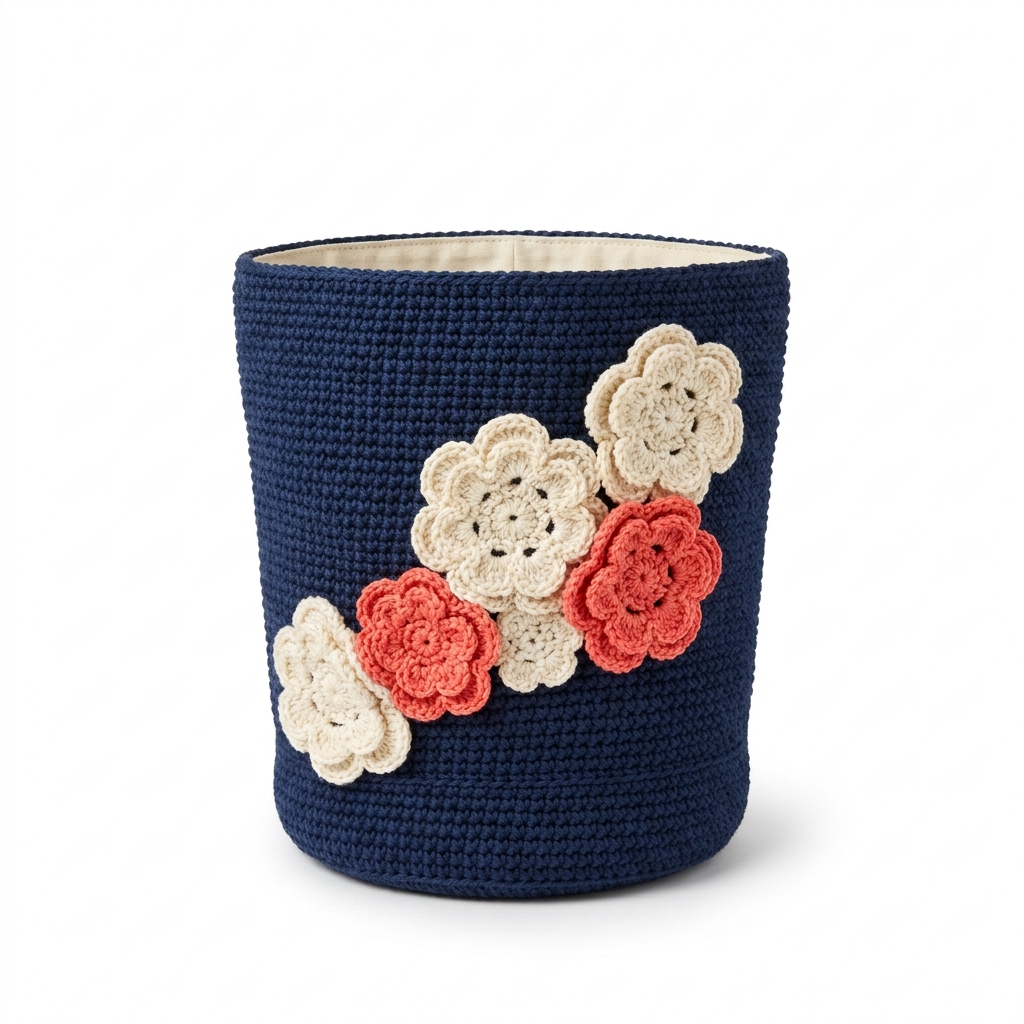
This Navy Nautical Floral Bucket Bag pattern is a charming accessory that adds a touch of whimsy to your outings. Its sturdy structure ensures that it can carry your essentials while the floral appliqués lend a delightful, stylish detail. We’ll be working with simple stitches like double crochet, single crochet, and slip stitch, making this project enjoyable yet rewarding.
This bucket bag is suitable for those with intermediate skills and offers a great opportunity to enhance your crochet abilities. You'll learn how to create a sturdy bag while also mastering a lovely floral appliqué technique.
Why You'll Love This Bucket Bag
- Functional design – carry all your essentials easily while showcasing your crochet skills.
- Charming details – floral appliqués add a personalized, stylish touch.
- Intermediate challenge – sharpen your crochet skills with this engaging project.
- Versatile bag – perfect for casual outings, beach days, or everyday use.
Is This Pattern Good for Beginners?
Yes! While the pattern is labeled as intermediate, it primarily uses basic stitches with clear instructions. If you’re ready to take on a few new techniques, like the floral appliqué, this bag is a perfect next step.
Crochet Abbreviations (US Terms)
- ch – chain
- dc – double crochet
- sl st – slip stitch
- sc – single crochet
- st – stitch
- sp – space
- blo – back loop only
- inc – increase (2 stitches in one st)
- dec – decrease (2 stitches together)
Floral Appliqué:
- Start with a magic ring.
- Round 1: ch 3 (counts as first dc), 11 dc in ring, pull tight. Join with sl st to top of ch 3. (12 dc)
- Round 2: dc in next st, inc in next st, repeat from * to * around. (18 dc)
- Round 3: dc in next 2 sts, inc in next st, repeat from * to * around. (24 dc)
- Finish off with a sl st and leave a long tail for sewing.
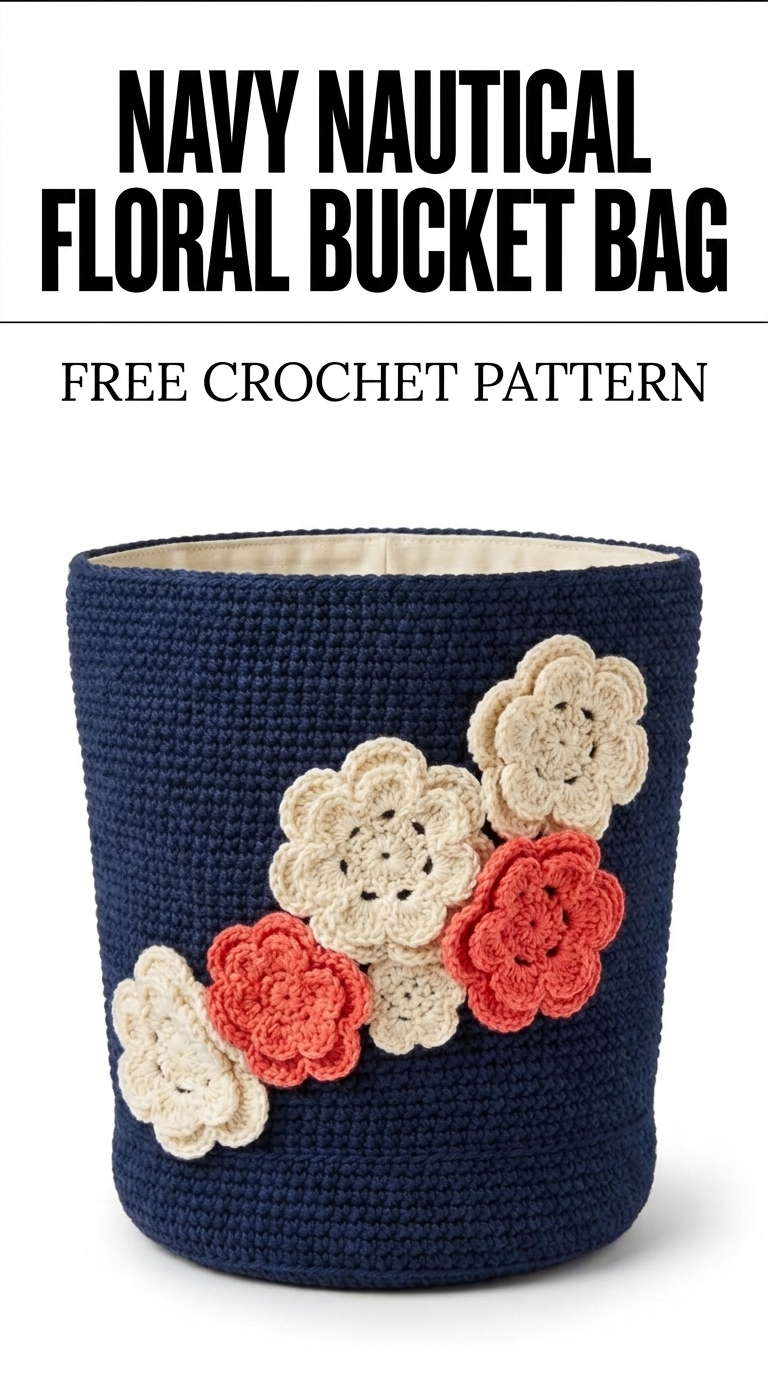
Image shown for inspiration — your finished result may vary slightly.
Size and Gauge
- Finished Size: Approximately 30 cm (12 in) tall and 25 cm (10 in) wide.
- Base Diameter: 25 cm (10 in).
- Gauge: 11 dc and 6 rows of dc = 10 cm (4 in) in double crochet. Check by making a swatch of 20 dc stitches.
How to Crochet a Bucket Bag (Step by Step)
Body of Bag
The body is made in rounds using Color A.
- With Color A, make a magic ring.
- Round 1: ch 3 (counts as first dc), 11 dc in ring. Pull tight. Join with sl st to the top of ch 3. (12 dc)
- Round 2: ch 3, dc in same st, 2 dc in each st around. Join. (24 dc)
- Round 3: ch 3, dc in next st, 2 dc in next st, repeat from * to * around. Join. (36 dc)
- Rounds 4–10: ch 3, dc in each st around. Join. (36 dc each round)
- Round 11: ch 1, sc in each st around. Join. (36 sc)
- Break yarn and weave in ends.
Base of Bag
The base is worked separately and then joined to the body.
- With Color A, repeat steps 1–4 of the body until you have a base of 24 dc (12 stitches on each side).
- Round 5: ch 1, sc in each st around. Join. (24 sc)
- Break yarn and leave a long tail for attaching to the bag body.
Joining Bag Body and Base
- Align the base with the bottom of the bag body.
- Use a tapestry needle to sew the two parts together with the long tail from both the bag body and the base.
Lining
- Cut fabric to measure slightly larger than the bag.
- Pin the fabric along the top edge of the bag, leaving a 2.5 cm (1 in) hem for a clean edge.
- Hand sew the lining into the bag's interior, ensuring it sits smoothly.
Floral Appliqué
- Make 3 floral appliqués in Color B and 2 in Color C following the special stitch instructions.
- Sew the flowers onto the bag wherever you prefer using matching threads.
Finishing Your Bucket Bag
Weave in all loose ends carefully. If desired, apply fabric stiffener to both the lining and the outside of the bag for added structure. Use a blocking mat to shape the bag appropriately.
Beginner Tips for a Neat Bucket Bag
- Use stitch markers to keep track of rounds and stitches.
- Count your stitches after each round to avoid errors.
- Maintain consistent tension throughout for a more polished finish.
Common Mistakes (and How to Fix Them)
- "My project is uneven." – This might be due to varying tension. Try to maintain a consistent grip on the yarn.
- "The bag feels too loose." – If it's too loose, check your gauge and consider using a smaller hook.
- "I lost track of my stitches!" – Always count your stitches at the end of each round for better accuracy.
How to Care for Your Bucket Bag
Hand wash your bag with mild detergent and lay it flat to dry. Avoid machine washing or drying to maintain its shape and integrity.
FAQ
How long will it take to finish the bucket bag?
It will take approximately 5–7 hours, depending on your crochet speed and experience.
Can I change the color scheme?
Absolutely! Feel free to experiment with different colors for the bag and floral appliqués to match your style.
Do I really need to line the bag?
While it's not mandatory, lining adds durability and structure, making it a valuable step if you want a long-lasting bag.
Want to create a complete set? Check out our range of patterns or try the matching floral accessories.