Ocean Wave Baby Romper Free Crochet Pattern
This adorable baby romper features a playful wave stitch pattern, making it perfect for warm weather outings.
Published October 5, 2026 · by Amanda
- Skill level
- Beginner
- Yarn weight
- Worsted (4)
- Hook size
- 5.0 mm (H-8)
- Time
- approximately 4 hours
- Gauge
- 12 sts and 8 rows = 10 cm
- Yardage
- about 300 yards
- Sizes
- 0-3 months
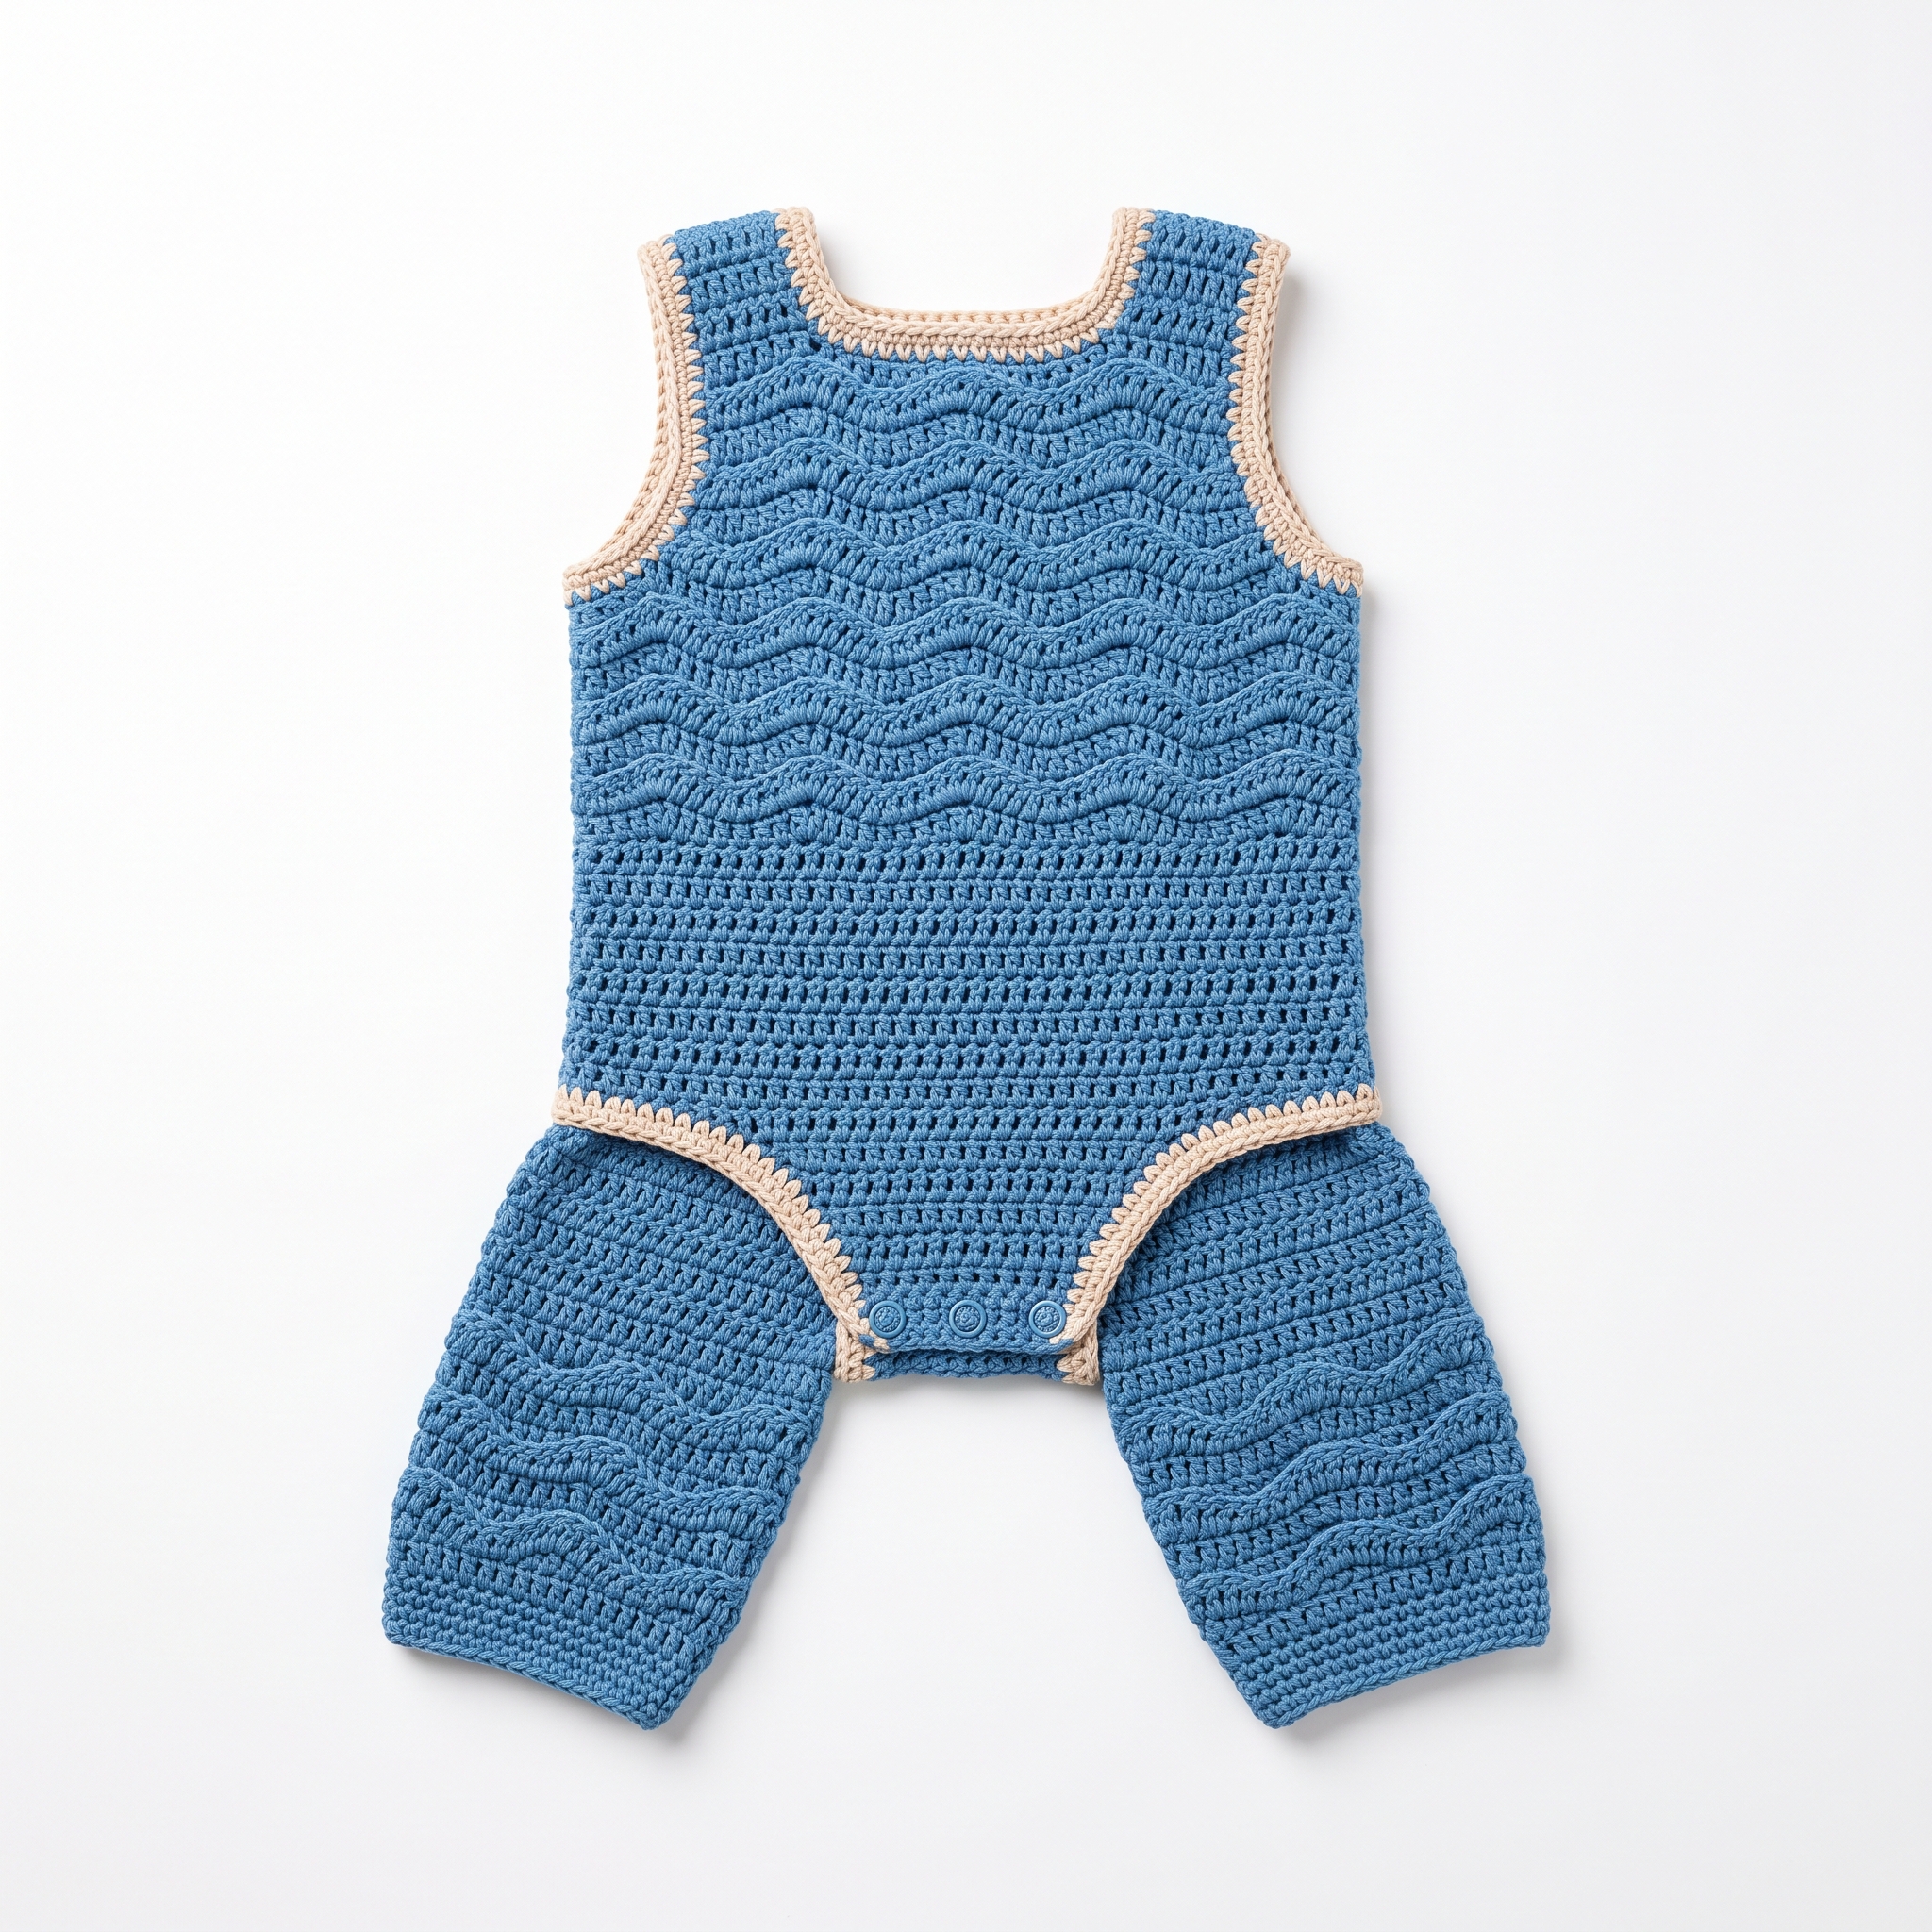
This Ocean Wave Baby Romper pattern is a delightful project that's perfect for warm weather outings. Featuring a playful wave stitch, it's not only cute but also practical, thanks to its easy snap closures for quick changes. You’ll enjoy using basic stitches like single crochet and double crochet, plus the wave stitch adds a lovely texture.
This pattern is suitable for beginners and experienced crocheters alike. You’ll learn how to create a charming romper for babies, which can be adjusted for sizes up to 6 months. Let’s get started!
Why You'll Love This Baby Romper
- Quick and manageable – complete this project in about 4 hours.
- Adorable design – the wave stitch adds a fun touch for any little one.
- Easy adjustments – modify the size easily by changing the chain length.
- Practical closures – use snaps for hassle-free dressing and diaper changes.
Skill Level: Easy
This pattern is perfect for those with basic crochet skills. You’ll need to know how to chain (ch), single crochet (sc), double crochet (dc), and treble crochet (tr).
Crochet Abbreviations (US Terms)
- ch – chain
- sc – single crochet
- dc – double crochet
- tr – treble crochet
- st(s) – stitch(es)
- rep – repeat
Wave Stitch:
- 1st wave: (in one st) 1dc, 1tr, 1dc
- 2nd wave: (in the next st) 1dc, 1tr, 1dc
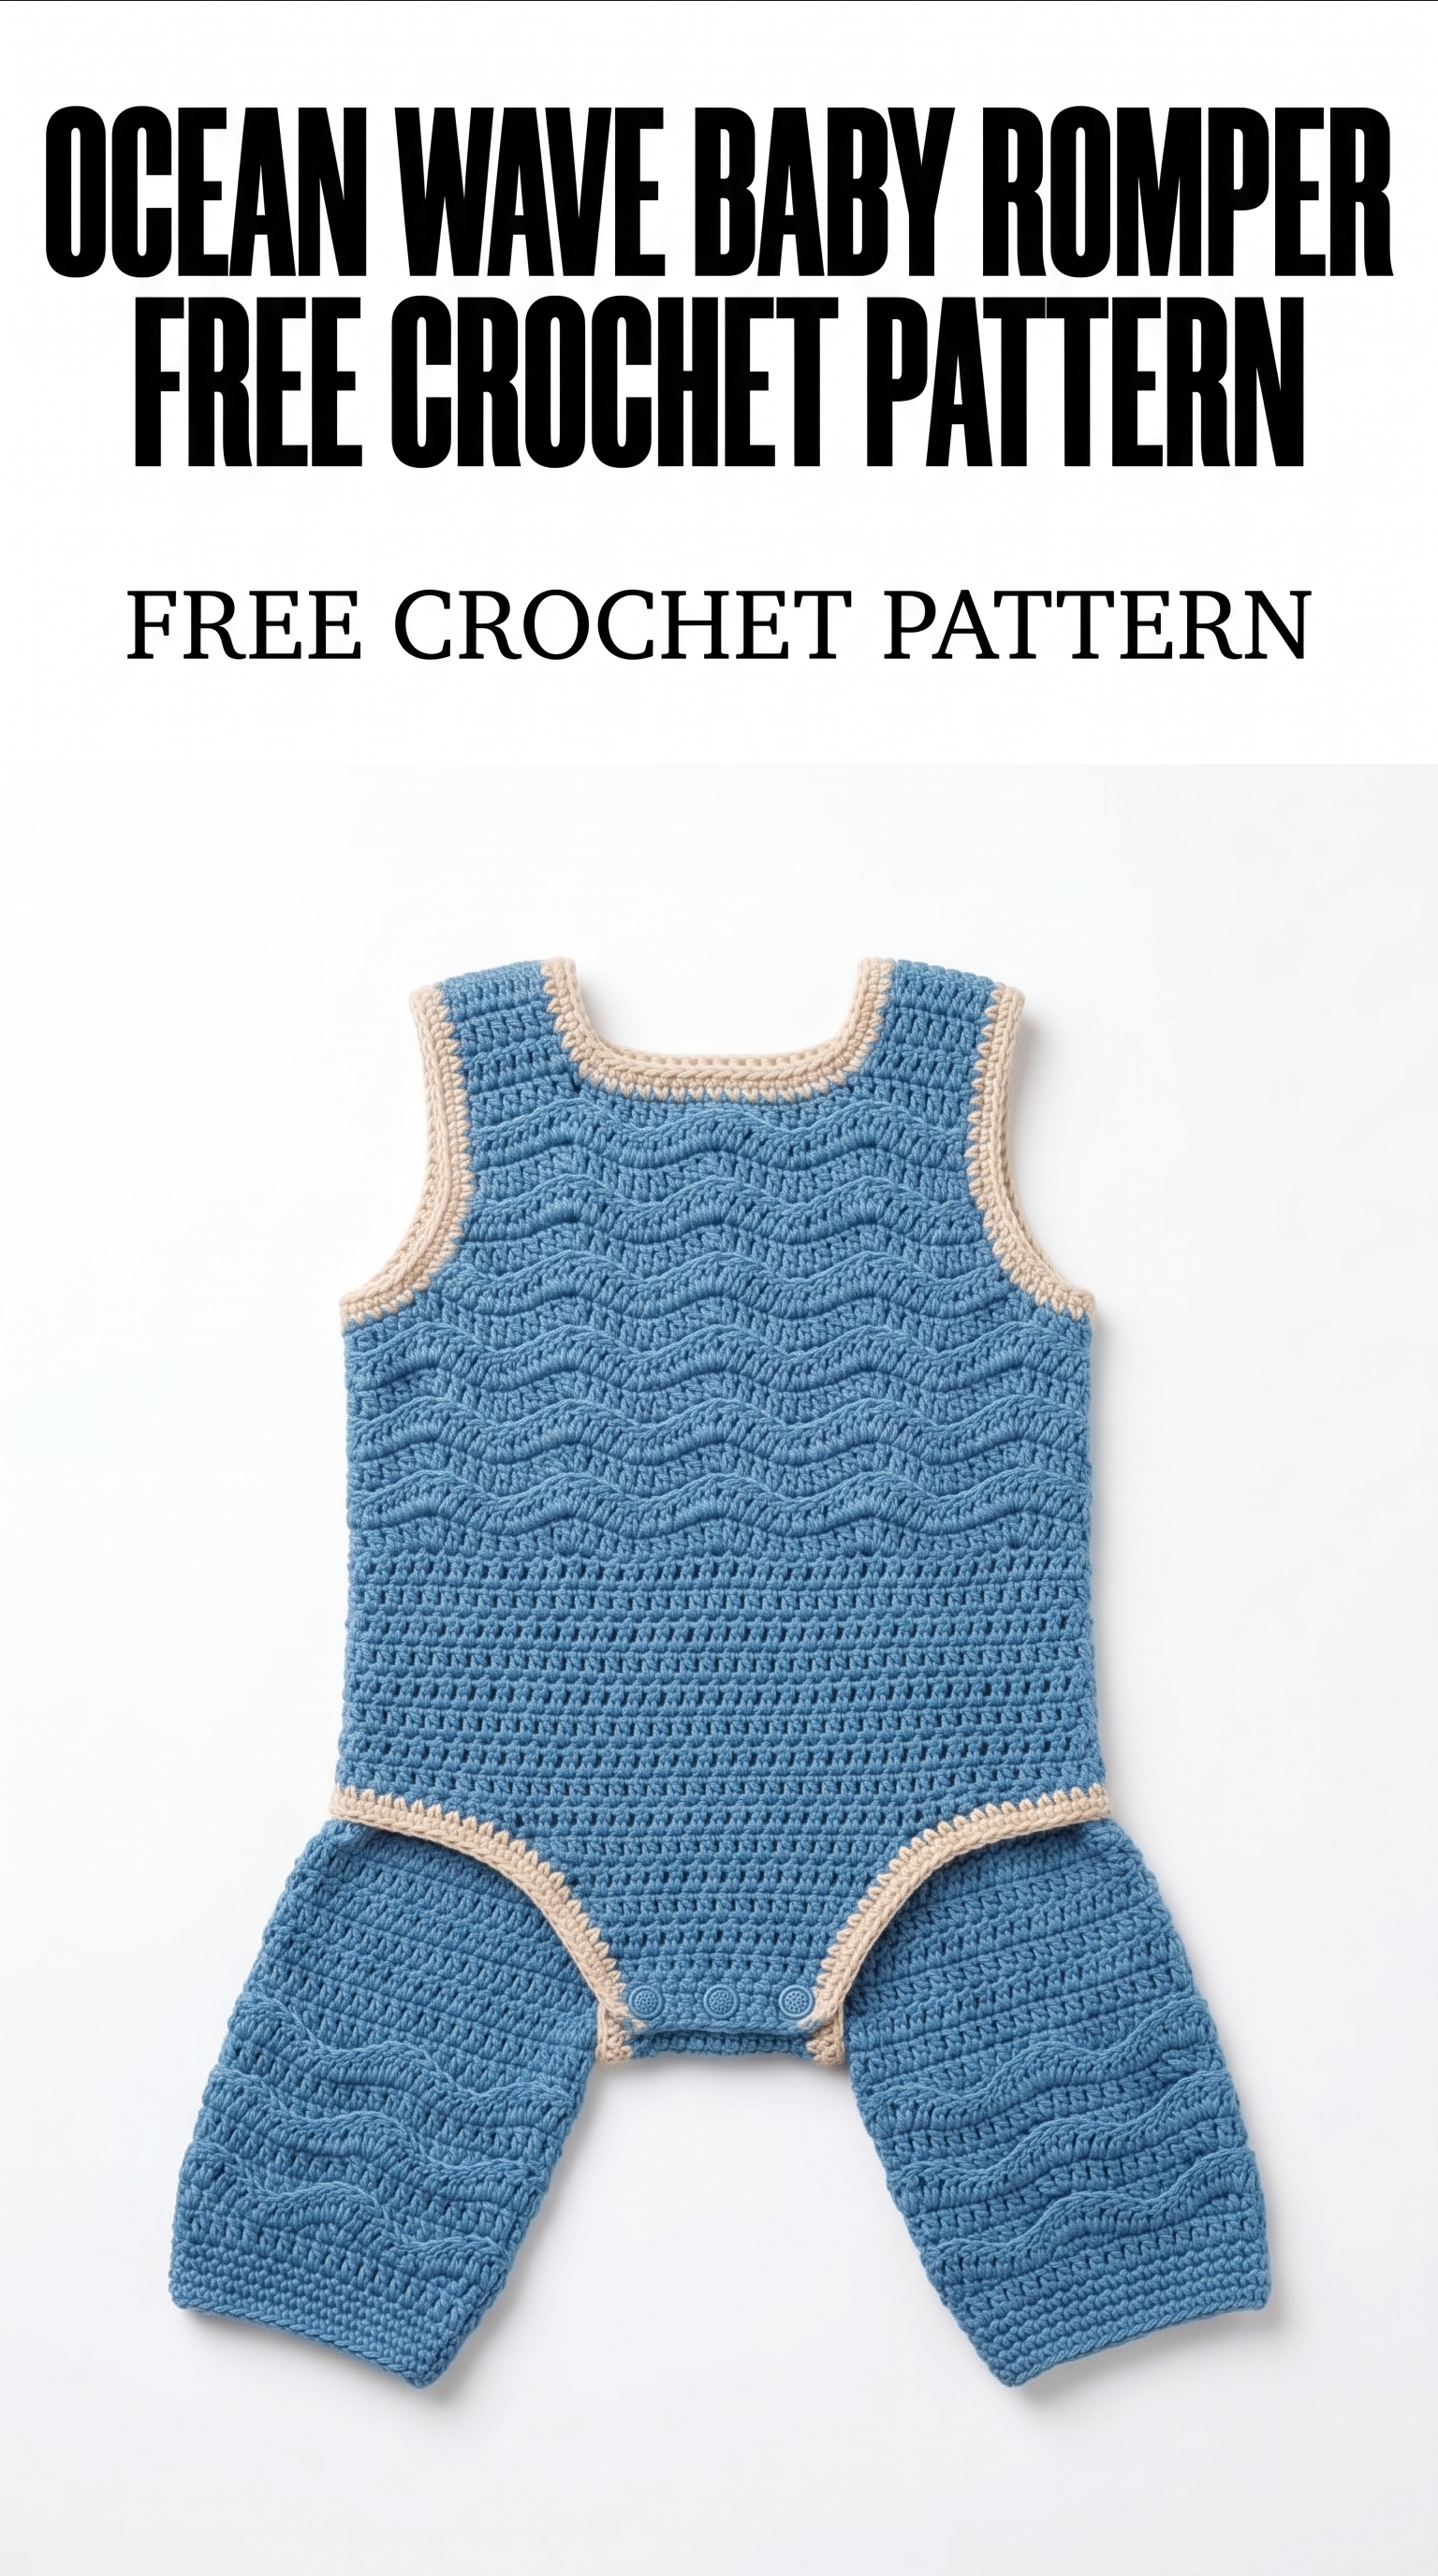
Image shown for inspiration — your finished result may vary slightly.
Size and Gauge
- Finished Dimensions: Chest: 46 cm (18 in); Length from shoulder to bottom: 51 cm (20 in); Each leg opening: 20 cm (8 in).
- Gauge: 12 stitches and 8 rows = 10 cm (4 in) in Wave Stitch pattern.
- Gauge is important to ensure your romper fits correctly. Check your gauge by crocheting a small swatch.
Step-by-Step Instructions
Bodice
The bodice is worked as a flat piece and then divided for legs.
- Foundation Chain: Ch 62. (62 sts)
- Row 1: Sc in the 2nd ch from hook and in each ch across. (61 sc)
- Row 2: Ch 3 (counts as dc), turn. *Skip 2 sc, in next sc work Wave Stitch (1dc, 1tr, 1dc); rep from * to end, finish with 1 dc in last sc. (20 waves + 1 dc)
- Row 3: Ch 1, turn. Sc in each stitch across. (61 sc)
- Rows 4–12: Repeat Rows 2–3 for a total of 5 wave pattern repeats, ending with Row 3.
Legs
The legs are worked separately from the bodice. 6. Divide for Legs: Split the bodice with 24 stitches for the left leg, 13 stitches for the body, and 24 stitches for the right leg.
Left Leg: 7. Row 1: Ch 1, turn. Work in sc across the left 24 sts. (24 sc) 8. Row 2: Ch 3, turn. Work Wave Stitch across. (8 waves) 9. Rows 3–5: Repeat Rows 1–2 for continuing rows. At the end of Row 5, fasten off. (24 sts)
Right Leg (Repeat the same as Left): 10. Row 1: Ch 1, turn. Work in sc across the right 24 sts. (24 sc) 11. Row 2: Ch 3, turn. Work Wave Stitch across. (8 waves) 12. Rows 3–5: Repeat Rows 1–2 for continuing rows. At the end of Row 5, fasten off. (24 sts)
Assembly
This step joins all the parts together. 13. Join the Shoulders: Align the front and back bodice sections, using whip stitch or slip stitch to sew the shoulder seams. 14. Seam the sides: Starting from the bottom of the legs, sew up to the underarm area on both sides of the romper, leaving spaces for the armholes. Use a mattress stitch for a neat finish. 15. Edges: Optionally, add a round of sc around the armholes and leg openings for a clean look.
Beginner Tips for a Neat Romper
- Use stitch markers to keep track of your rows and sections.
- Count your stitches regularly to avoid mistakes.
- Keep an even tension for consistent stitch size across your project.
Common Mistakes (and How to Fix Them)
- "My stitches are too tight." – This could mean your tension is too tight; try using a larger hook size.
- "The leg openings are too small." – Make sure to count your rows correctly; you may need to adjust the row count for a larger size.
- "My waves don't look even." – Ensure you’re following the wave stitch pattern carefully and check you’re not skipping any stitches.
FAQ
How do I change the size of the romper?
You can change the size by adjusting the foundation chain length. To fit a larger baby, simply add more chains in multiples of the wave pattern.
What type of yarn should I use?
For this pattern, worsted weight (Category 4) 100% cotton yarn is ideal. It keeps the romper soft and breathable for babies.
Can I make this romper in different colors?
Absolutely! Feel free to explore color combinations; pastel shades or bright colors will all work beautifully.
Want to create a complete set? Check out our range of patterns or try the matching hat.