Sage and Cream Granny Square Baby Overalls Free Pattern
A free pattern for adorable granny square baby overalls, featuring sage and cream colors, perfect for stylish infants.
Published October 5, 2026 · by Amanda
- Skill level
- Beginner
- Yarn weight
- Light Worsted (3)
- Hook size
- 4.0 mm (G-6)
- Time
- 3–4 hours
- Gauge
- 12 dc and 8 rows = 10 cm
- Yardage
- about 450 yds
- Sizes
- 20 × 25 cm (8 × 10 in)
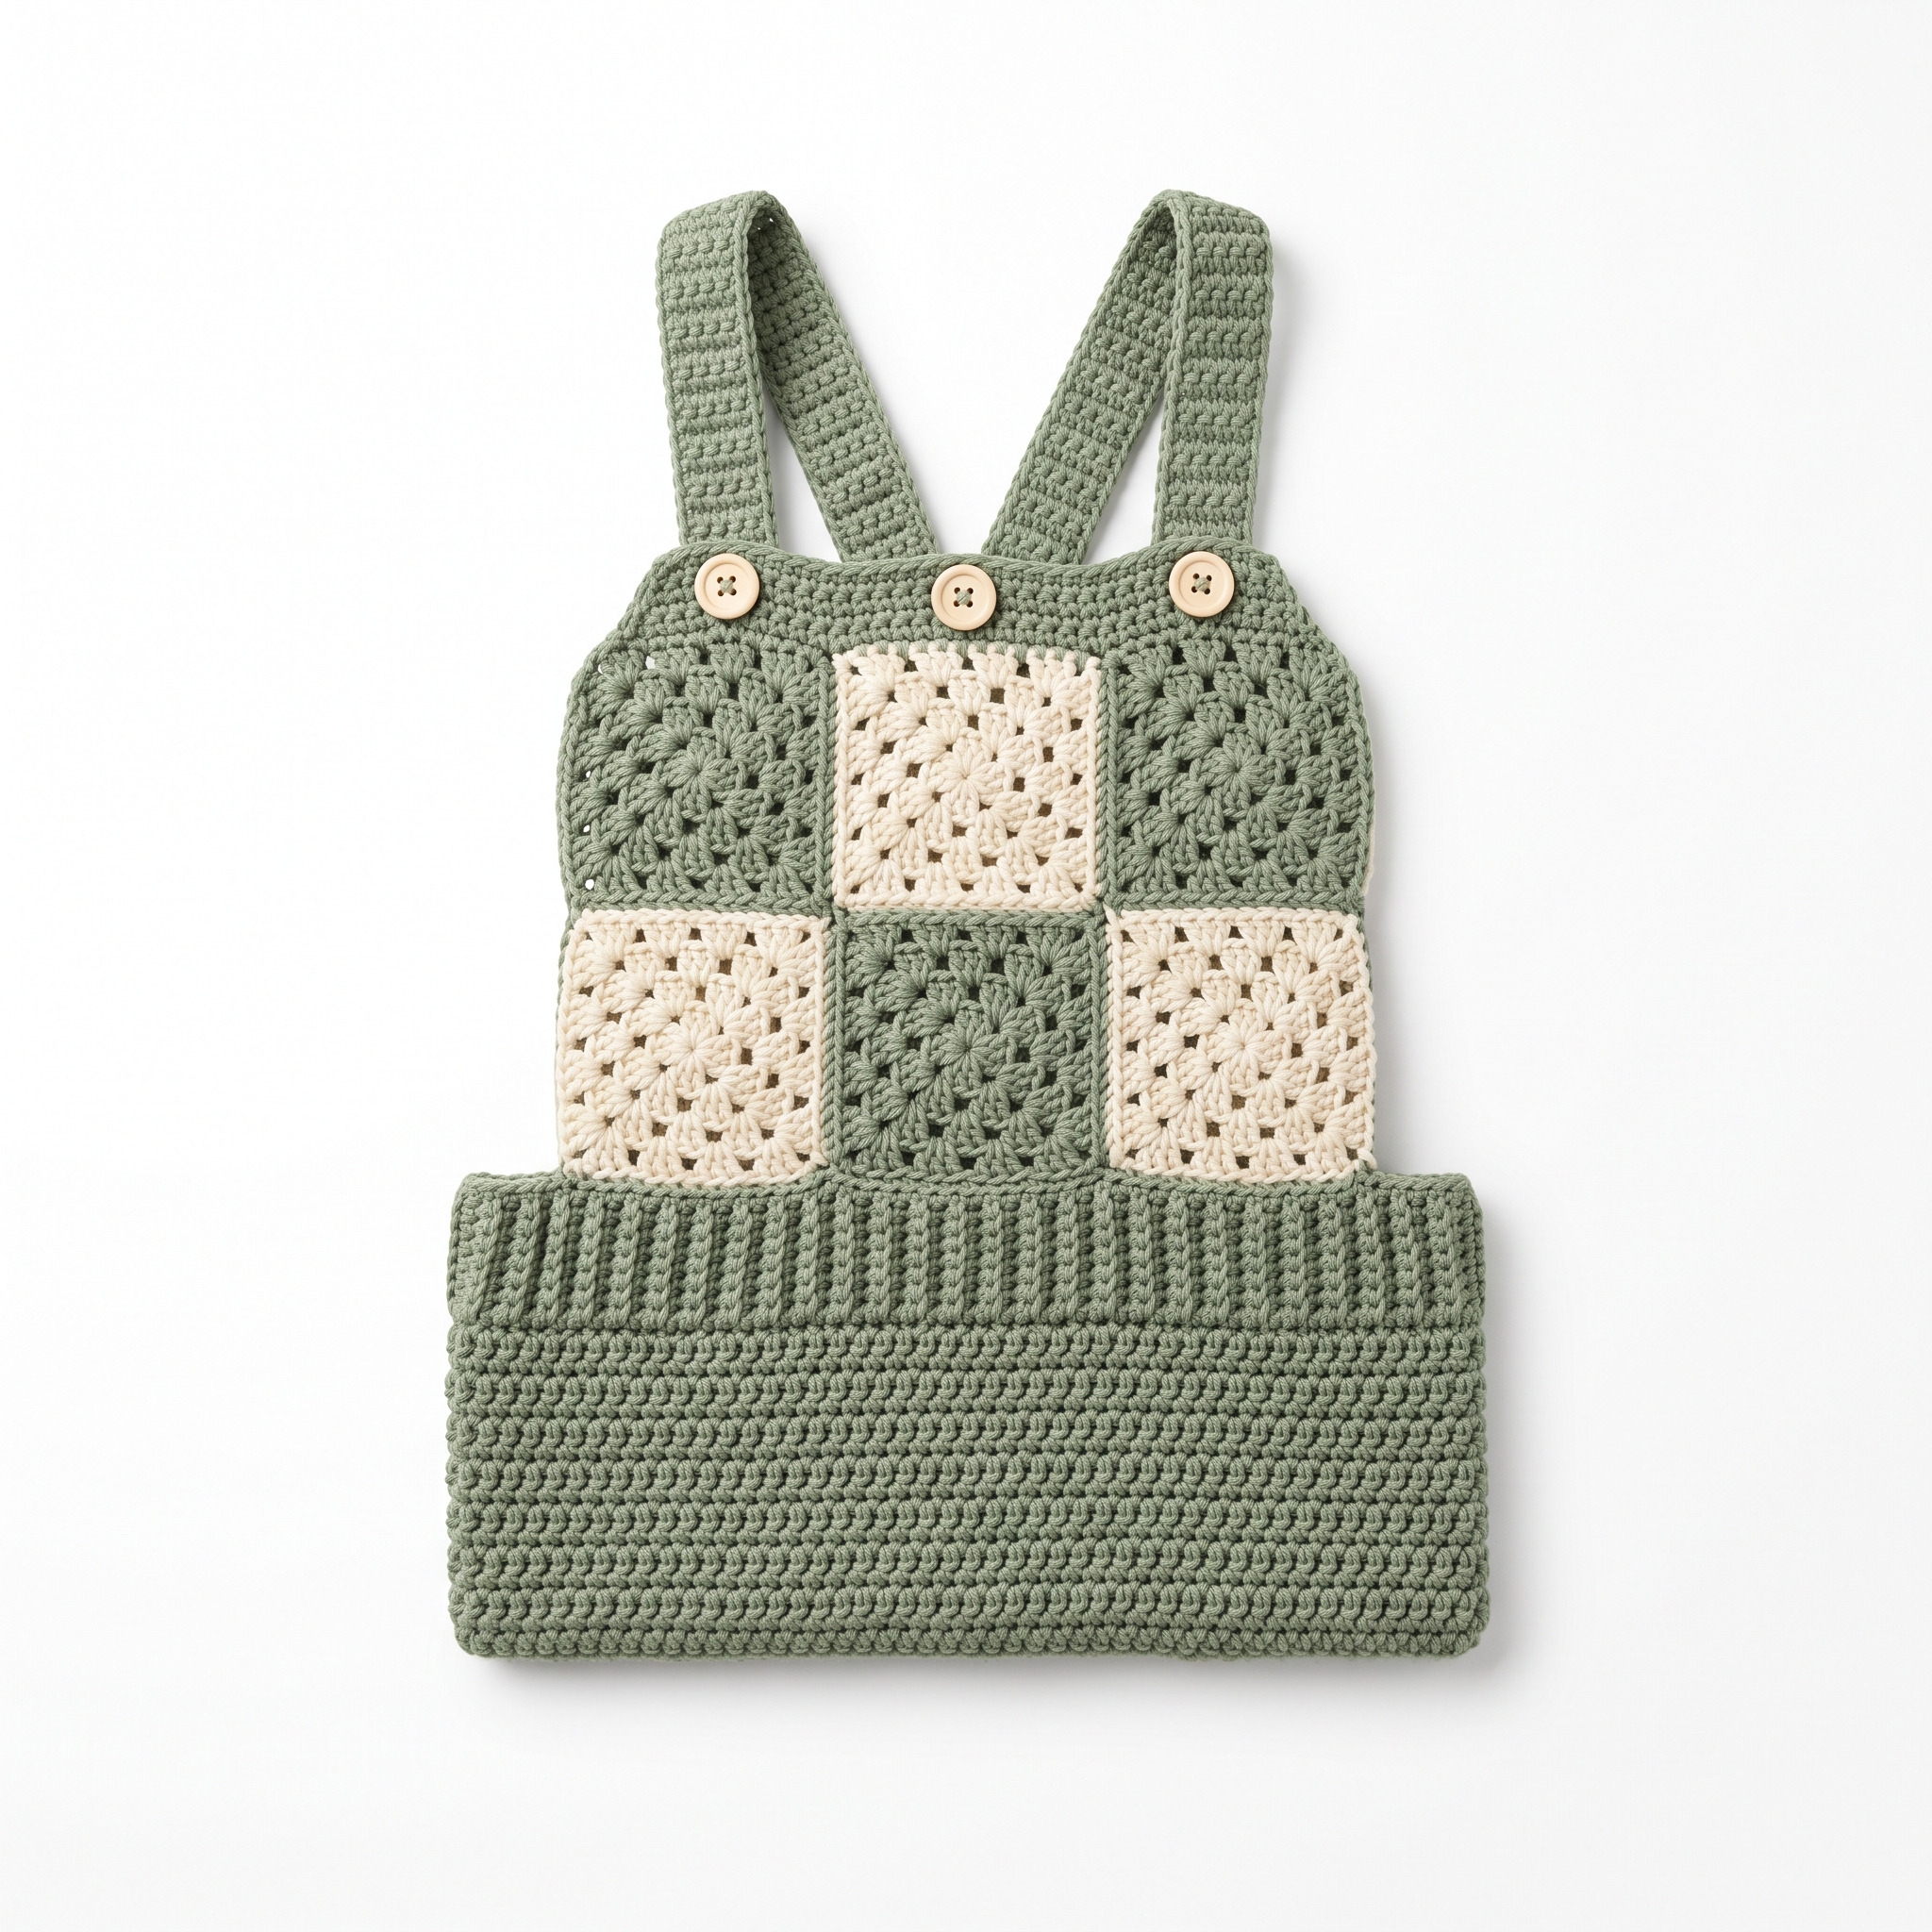
These sage and cream granny square baby overalls are perfect for your little one. They are not only stylish but also cozy and comfortable, made with classic granny squares. You'll be using only basic stitches like double crochet (dc) and slip stitch (sl st), making this project easy to tackle.
This pattern is suitable for crocheters of all skill levels, especially those new to granny squares or looking to create a fun baby outfit. You’ll learn how to make granny squares, join them, and complete a simple garment.
Why You'll Love This Project
- Fun and stylish – create a trendy outfit for your baby!
- Easy construction – use simple stitches and techniques.
- Quick to make – complete this project in just a few hours.
- Customizable – change colors and sizes to fit any little one.
Is This Pattern Good for Beginners?
Yes! This pattern is perfect for beginners. You’ll be guided through making basic granny squares and simple shaping, all while building your confidence.
Crochet Abbreviations (US Terms)
- ch – chain
- dc – double crochet
- sl st – slip stitch
- st(s) – stitch(es)
How to Make a Granny Square
- Foundation: Ch 4 and sl st to form a ring.
- Round 1: Ch 3 (this counts as the first dc), then add 2 more dc into the ring, ch 2, *add 3 dc into the ring, ch 2; repeat from * two more times, sl st to join.
- Further Rounds: For Round 2, sl st into the ch-2 space, then continue adding groups of dc and ch-2 spaces.
Size and Gauge
- Finished Size: Fits 6–12 months (approx. 20 × 10 in / 51 × 25 cm)
- Gauge: 12 dc and 8 rows = 10 cm (4 in) in granny square pattern.
To check gauge, make a swatch of 12 dc in a granny square. Adjust your hook size if necessary.
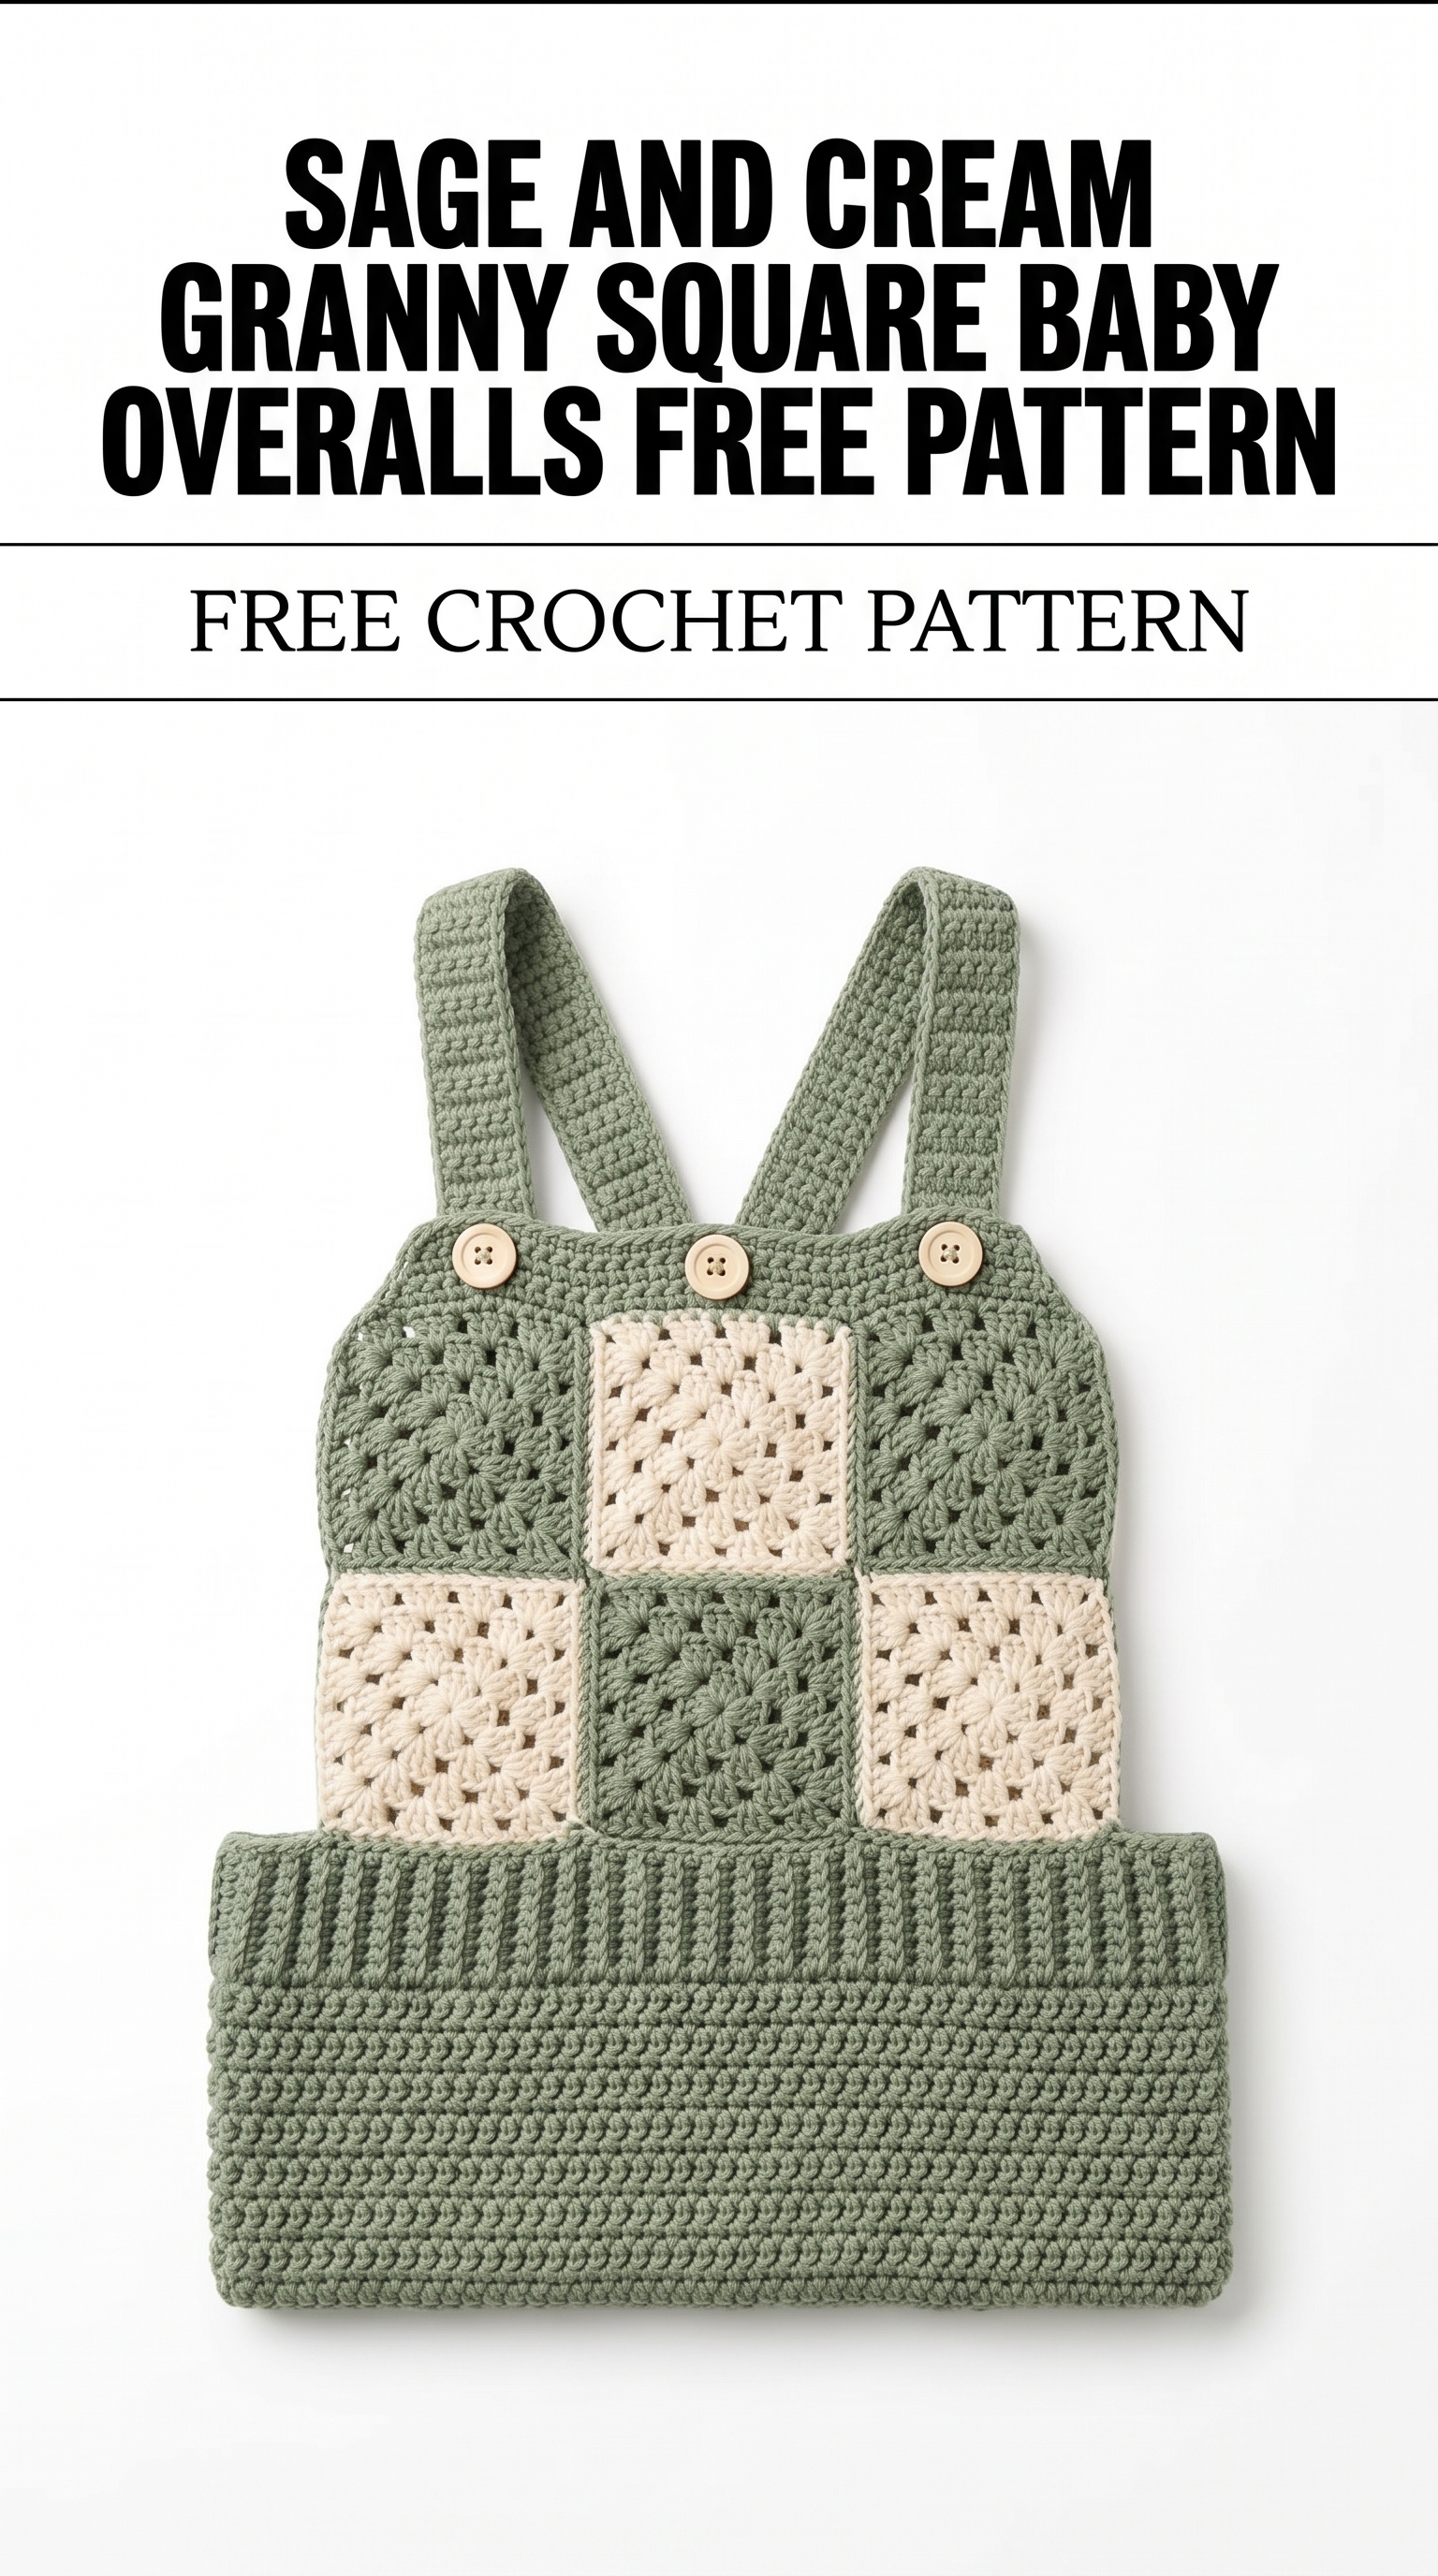
Image shown for inspiration — your finished result may vary slightly.
Step-by-Step Instructions
Granny Squares (Make 6 squares)
The granny squares form the basis of the overalls.
- Using Color A, ch 4, sl st to first ch to form a ring.
- Round 1: Ch 3 (counts as 1st dc), 2 dc in ring, ch 2, *3 dc in ring, ch 2; repeat from * twice more, sl st to top of beginning ch (12 dc, 4 ch-2 spaces).
- Round 2: Sl st into first ch-2 space, ch 3, 2 dc in same space, ch 2, *3 dc in next ch-2 space, ch 2; repeat from * around, sl st to top of beginning ch (24 dc, 4 ch-2 spaces).
- Round 3: Sl st into first ch-2 space, ch 3, 2 dc in same space, ch 2, *3 dc in next ch-2 space, ch 2; repeat from * around, sl st to top of beginning ch (36 dc, 4 ch-2 spaces).
- Fasten off and weave in ends. Block squares if desired.
Note: Make 3 squares using Color A and 3 using Color B.
Joining Squares
Next, we will join the squares to shape the overall.
- Arrange the squares in two rows of three.
- Using Color A, join squares together using a whip stitch or sl st:
- Join first row squares (3 squares).
- Join the second row squares.
- Finally, join both rows together to form the overall shape.
Body
The body is worked in one continuous piece.
- Starting at the waistband, with Color A, ch 60 (or desired size).
- Row 1: Hdc in 2nd ch from hook, hdc in each ch across (59 hdc).
- Rows 2–6: Ch 1, turn, hdc in each st (59 hdc).
- Fasten off.
Top Edging
Add a nice finish to the top.
- With the right side facing, join Color A at the top edge of the front.
- Row 1: Ch 1, sc in each st across.
- Fasten off and weave in ends.
Straps (Make 2)
These straps will provide the needed adjustments.
- With Color A, ch 50.
- Row 1: Hdc in 2nd ch from hook, hdc across (49 hdc).
- Fasten off, leaving a long tail for sewing.
- Attach each strap to the back of the overall at the corners (approx. 3 inches from the shoulder).
Assembly & Finishing
Let’s finish up your project!
- Sew buttons onto the front of the overalls at the base of the straps for adjustable fastening.
- Weave in all ends securely, and block the overall to shape if needed.
Beginner Tips
- Use stitch markers to keep track of your rounds.
- Count your stitches at the end of each row to stay on track.
- Keep an even tension for consistent squares.
Common Mistakes (and How to Fix Them)
- "My project is uneven." – This could be caused by inconsistent tension; try to keep your tension even.
- "My squares are not the same size." – Make sure to check your gauge and adjust your hook size as necessary.
- "The straps are too loose." – If this happens, try reducing the chain length for the straps next time or adjust where you attach them.
How to Care for Your Baby Overalls
These overalls are machine washable on a gentle cycle. Lay them flat to dry to maintain shape.
FAQ
How long will it take to make these overalls?
The total estimated time is around 3–4 hours, depending on your skill level.
Can I change the colors?
Absolutely! Feel free to mix and match colors to create a unique look.
What size baby do these fit?
These overalls are designed to fit infants approximately 6–12 months old.
Want to create a complete set? Check out our range of patterns or try the matching hat.